Welcome to our comprehensive tutorial on integrating weather data using the Farmonaut API. In this article, we will explore various weather data endpoints available in the API documentation. By the end of this session, you will have a thorough understanding of how to retrieve current, historical, and forecast weather data. Additionally, we’ll cover how to obtain weather data based on specific coordinates and generate graphs showing weather trends.

 The response will include coordinates (longitude and latitude), weather temperature, feels-like temperature, minimum and maximum temperatures, pressure, humidity, visibility, wind speed, clouds, country, sunrise, and sunset times. This wealth of information can be effectively utilized in your applications.
The API response will provide you with details such as humidity, maximum wind, temperature, pressure, and wind speed over the specified duration. This data can be invaluable for analyzing trends and making informed decisions.
The response will include coordinates (longitude and latitude), weather temperature, feels-like temperature, minimum and maximum temperatures, pressure, humidity, visibility, wind speed, clouds, country, sunrise, and sunset times. This wealth of information can be effectively utilized in your applications.
The API response will provide you with details such as humidity, maximum wind, temperature, pressure, and wind speed over the specified duration. This data can be invaluable for analyzing trends and making informed decisions.
 The response will include latitude, longitude, timezone, daily weather forecast, sunrise, sunset, moonrise, temperature for the day, maximum temperature, and a summary of the expected weather conditions. For instance, it might indicate a partly cloudy day with clear spells, along with pressure, humidity, and wind speed details.
 This API call will return forecast data similar to what you receive from the Get Forecast Weather endpoint, providing daily forecasts for the specified coordinates.
 Upon successful API call, the response will include a URL that directs you to the generated graph image, allowing you to visualize the weather trends effectively.
 If you have any questions, feel free to reach out. Thank you for watching, and see you in the next tutorial!
Overview of Weather Data Endpoints
The Farmonaut API provides multiple weather data endpoints. We will review them one by one, starting with how to get the present weather data. This knowledge is essential for any application that relies on accurate weather information.
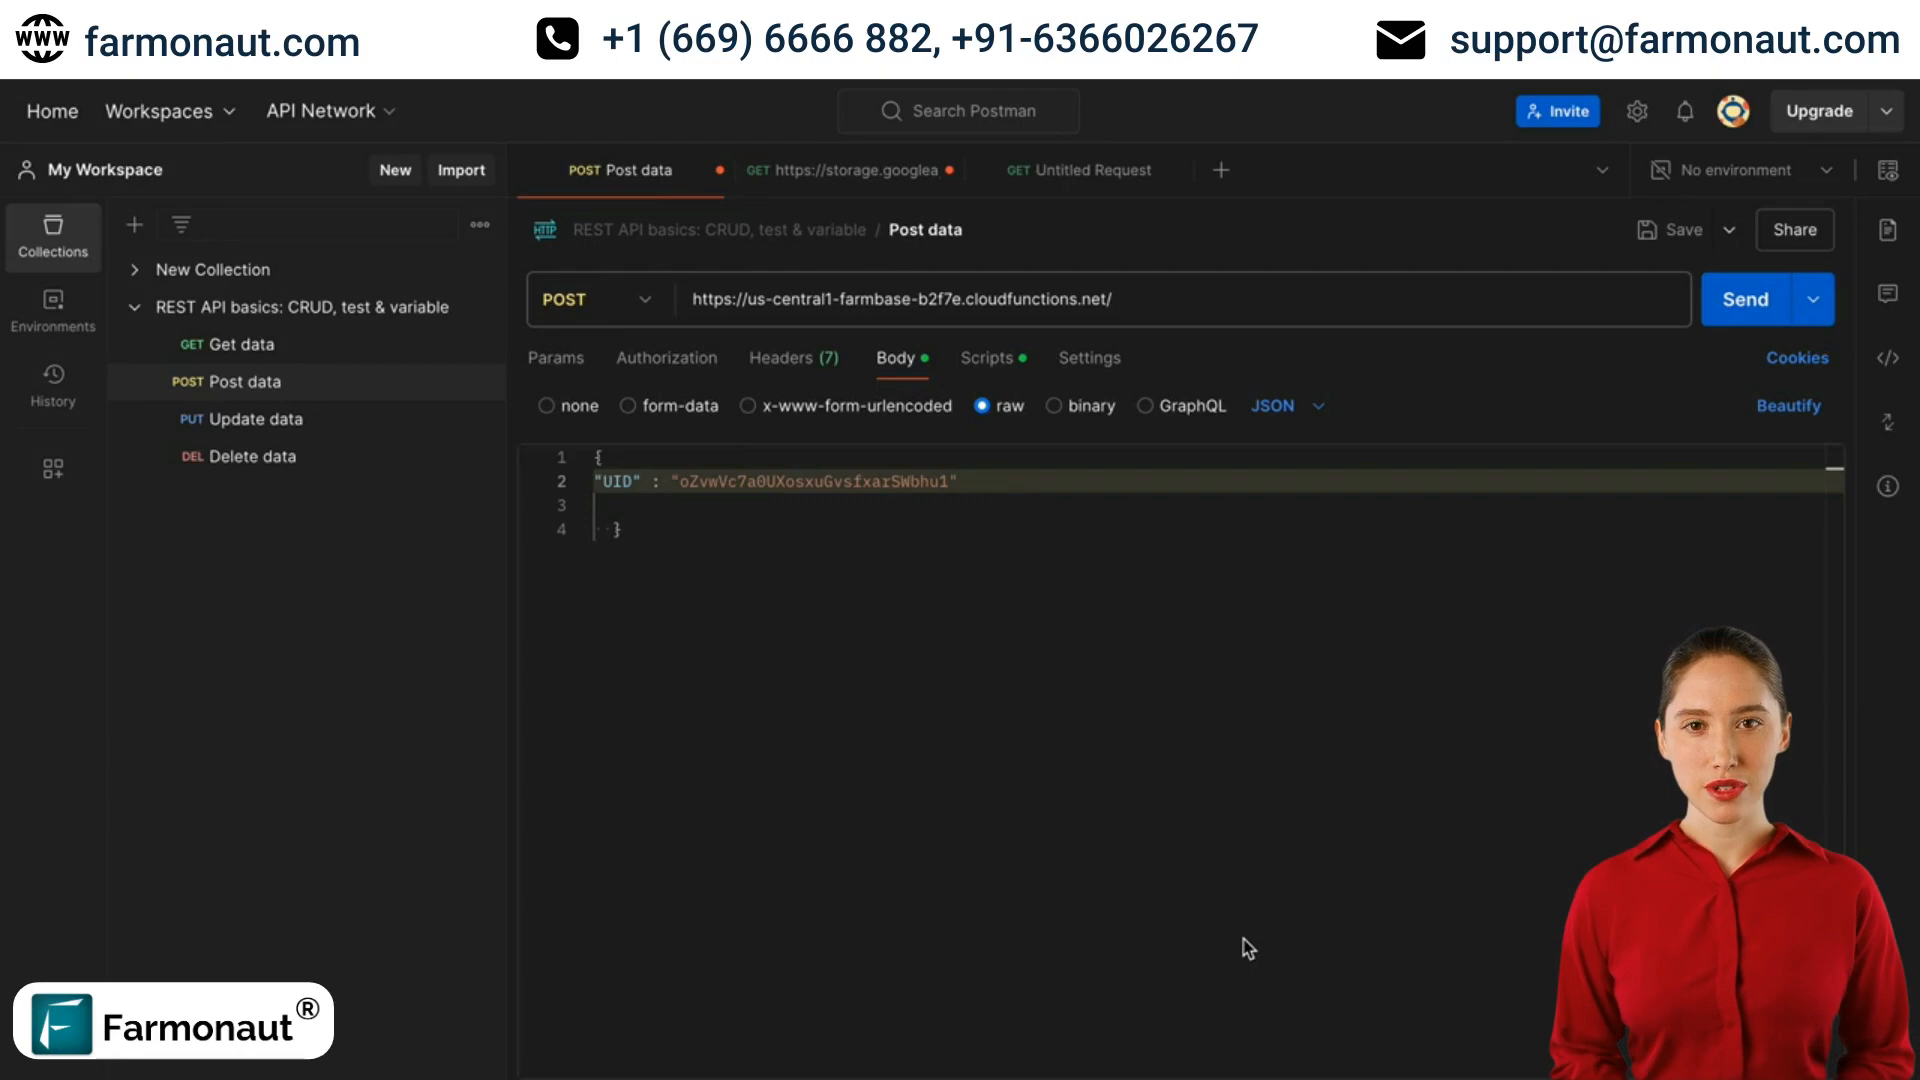
Retrieving Present Weather Data
To get the present weather data, we use the endpoint known as Get Present Weather. For this, you need to pass the UID and the Field ID for which you want the weather data. Once you click the send button, the API will return a response containing various details.
The response will include coordinates (longitude and latitude), weather temperature, feels-like temperature, minimum and maximum temperatures, pressure, humidity, visibility, wind speed, clouds, country, sunrise, and sunset times. This wealth of information can be effectively utilized in your applications.
Getting Historical Weather Data
If you want to retrieve past weather data, you can use the Get Historical Field Weather endpoint. For this, you’ll need to pass the UID, Field ID, and the number of days for which you want the data. For example, if you want the data for the past five days, you would set that parameter accordingly.
The API response will provide you with details such as humidity, maximum wind, temperature, pressure, and wind speed over the specified duration. This data can be invaluable for analyzing trends and making informed decisions.
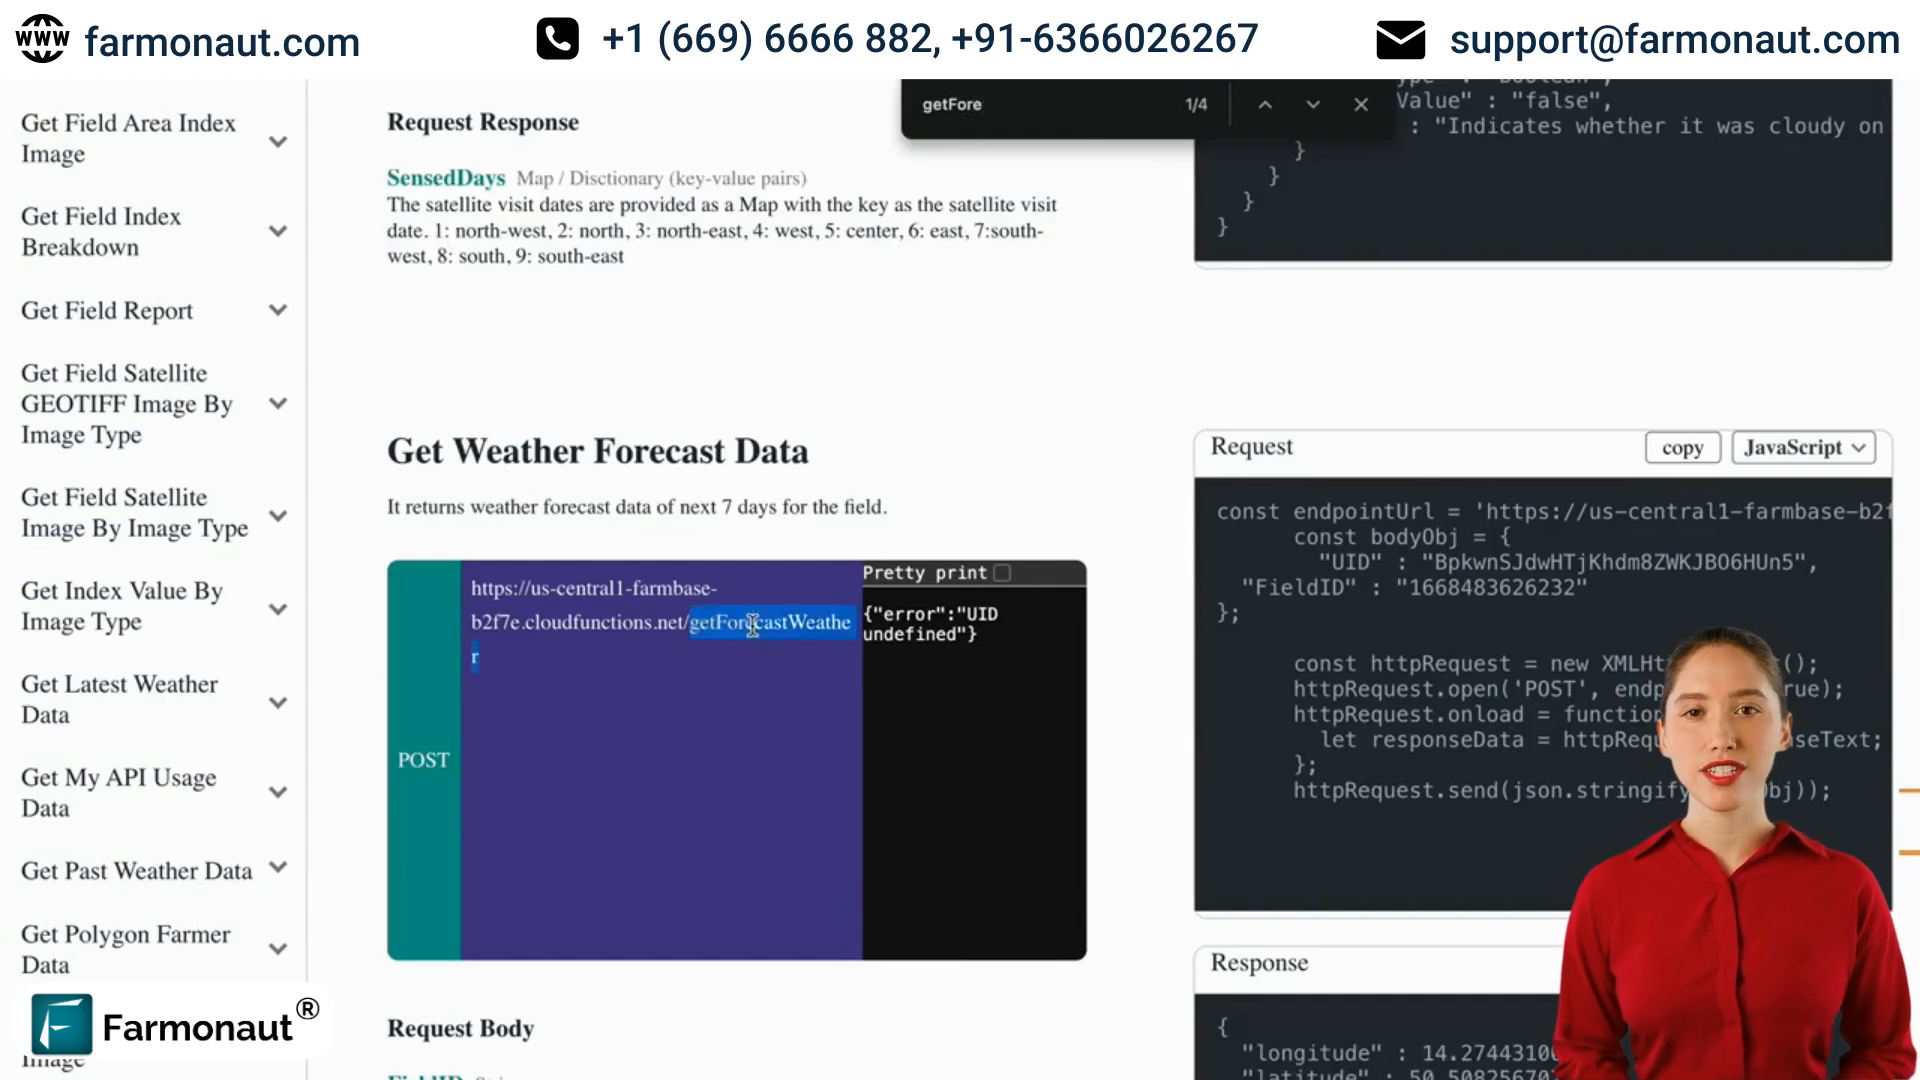
Fetching Weather Forecast Data
To obtain future weather data, you can use the Get Forecast Weather endpoint. Here, you only need to pass the UID and Field ID, as the number of days parameter is not required.
The response will include latitude, longitude, timezone, daily weather forecast, sunrise, sunset, moonrise, temperature for the day, maximum temperature, and a summary of the expected weather conditions. For instance, it might indicate a partly cloudy day with clear spells, along with pressure, humidity, and wind speed details.
Retrieving Forecast Data by Latitude and Longitude
Suppose you want to fetch the forecast data for a specific latitude and longitude. In that case, you can easily do so by using the endpoint Get Forecast Weather from Latitude and Longitude. You will need to input the UID, latitude, and longitude of the location.
This API call will return forecast data similar to what you receive from the Get Forecast Weather endpoint, providing daily forecasts for the specified coordinates.
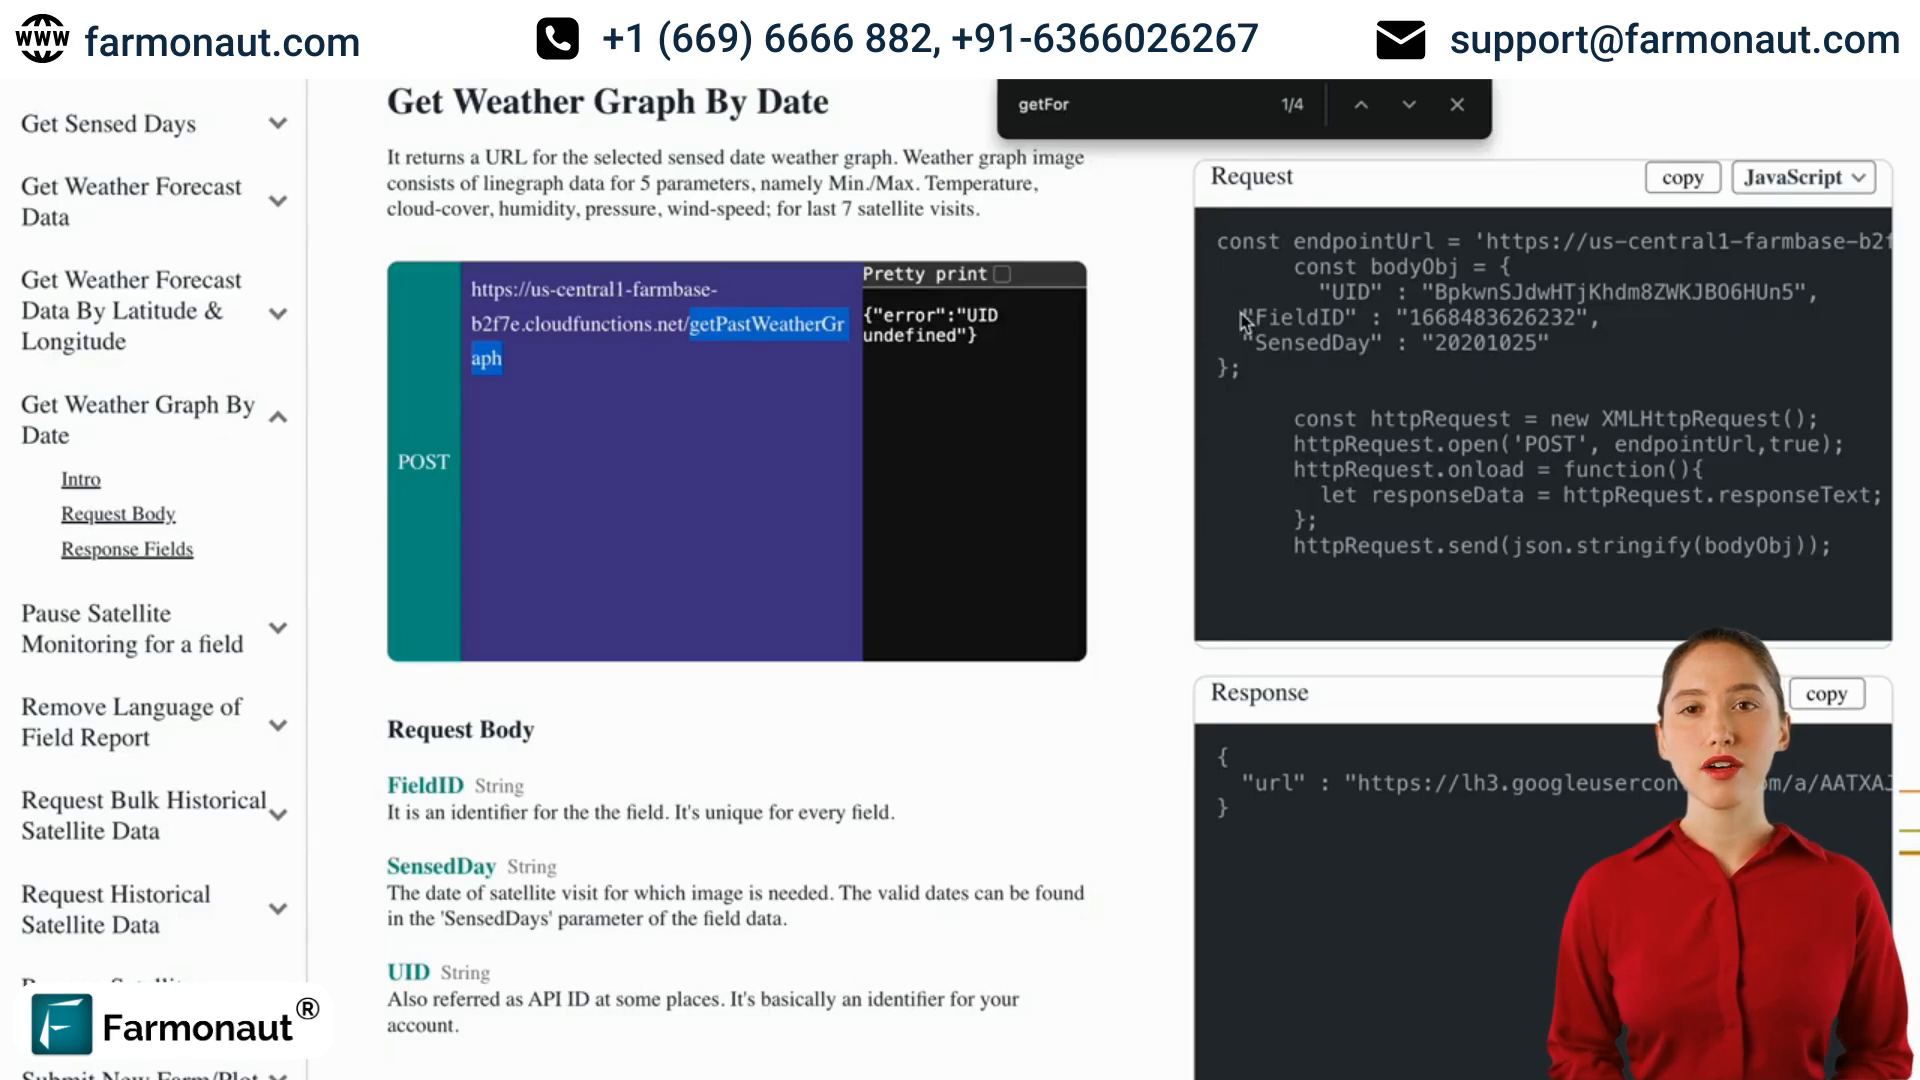
Generating Weather Trend Graphs
The Farmonaut API also allows you to generate graphs of humidity, pressure, and more, demonstrating how these parameters have changed over recent days. These graphs can be retrieved through the Get Past Weather Graph endpoint, where you will pass the Field ID and the timestamp for the desired data.
Upon successful API call, the response will include a URL that directs you to the generated graph image, allowing you to visualize the weather trends effectively.
Conclusion
This tutorial has covered the key aspects of integrating weather data using the Farmonaut API. We explored how to retrieve present, historical, and forecast weather data, both by Field ID and specific coordinates. Additionally, we saw how to generate and retrieve weather trend graphs. With this knowledge, you can now effectively utilize these endpoints to integrate rich weather data into your applications.
If you have any questions, feel free to reach out. Thank you for watching, and see you in the next tutorial!