How to Grow Chickpeas in Warm Climates: Top 7 Tips
“Chickpeas need soil temperatures above 10°C; optimal yields occur when planted at 15–18°C in warm climates.”
Introduction
Chickpeas (Cicer arietinum), commonly referred to as garbanzo beans, remain a cherished legume and a staple in diets worldwide. Noted for high protein, abundant fiber, and an impressive profile of essential nutrients, chickpeas have been a favored crop for human consumption and improving soil health. They also offer a sustainable farming option by fixing atmospheric nitrogen and enhancing soil structure in rotational cropping systems.
However, growing chickpeas in warm climates like Florida, Southern India, or Hawaii brings unique challenges and opportunities. Warm environments, with their higher temperatures and often unpredictable water patterns, require strategic management to ensure successful, high-yield chickpea cultivation.
This comprehensive guide draws on the latest research and regional experience to provide expert, step-by-step instructions on every vital aspect, including:
- Chickpea soil preparation and pH management
- Optimal planting windows for regions like Florida and Hawaii
- Seed selection, sowing techniques, spacing, and shade recommendations
- Irrigation strategies to maximize yield and prevent root rot
- Pest and disease management, including organic methods
- The role of mulching for chickpeas to conserve water and minimize weeds
- Effective chickpea harvesting methods
Let’s delve into the top 7 tips for bountiful chickpea crops in warm climates!
Chickpea Cultivation in Warm Climates: Essential Overview
Before exploring the actionable steps, it’s critical to understand why chickpeas are well-suited to warm but manageably dry environments and how proper management boosts yields. Chickpea is a short-day, cool-season legume, but over time, desi and kabuli varieties adapted to a range of climates—from Mediterranean zones to subtropical regions.
- Drought tolerance: Chickpea roots reach deep water tables, surviving prolonged dry spells.
- Soil enhancement: As a legume, it fixes nitrogen, reducing the need for synthetic fertilizer near neutral pH.
- Flexibility in rotation: It can thrive after wheat or rice, disrupting disease cycles and improving soil fertility.
We explore each cultivation step in detail below, tailoring advice for warm settings to minimize crop stress, maximize nutrient uptake, and deliver consistently high yields.
Step 1: Soil Preparation for Chickpeas
Chickpea soil preparation is foundational to healthy crop growth, particularly in warm climates. Let’s break down the science-backed steps to create an ideal, fertile bed for your chickpeas.
1.1. Assessing and Amending Soil pH & Fertility
- Perform a soil test to assess current pH and nutrient levels, paying special attention to phosphorus (for root development) and potassium.
- The optimal soil pH for chickpeas is 5.3–7.0 (ideally near 6.0). Amend overly acidic soils with agricultural lime and address highly alkaline soils with elemental sulfur.
Tip: Chickpeas do not tolerate saline or highly alkaline soils — maintaining neutral pH ensures robust growth and prevents nutrient lockout.
1.2. Enhancing Structure and Drainage
- Integrate 2–4 inches of high-quality organic matter such as well-rotted compost or aged manure before planting. This step enriches soil fertility, boosts microbial health, and improves structure.
- In warm climates, excellent drainage is crucial to prevent compaction and waterlogging — major culprits of root rot and other diseases.
- Where heavy soils persist, construct raised beds or form gentle ridges for improved root zone aeration and drainage.
1.3. Bed Preparation
- Plow or till the soil to a depth of 20–30 cm (8–12 inches) weeks before planting. This loosens the substrate and removes deep-rooted weeds.
- Level the bed to eliminate standing water after rain or irrigation, further reducing disease risk.
Farmonaut’s Role in Soil Monitoring
With precise satellite-based crop health monitoring, we at Farmonaut empower farmers to map soil moisture variability and health in real time. Access these insights with our web and mobile app—optimizing preparation and nutrient input for every soil type.
Step 2: Seed Selection & Best Time to Plant Chickpeas
Seed quality and timing are everything in chickpea cultivation, especially as temperatures rise. Here’s how to optimize both in your region:
2.1. Choosing High-Quality Seeds
- Select certified disease-free seeds. Both Desi (small, dark, drought-tolerant) and Kabuli (large, light-colored) types are suited for warm climates.
- Opt for organic seeds to ensure the absence of pesticide residues—supporting organic chickpea cultivation and healthier plants.
- Verify germination rates (>85%) and treat with a biofungicide if necessary.
2.2. Best Time to Plant Chickpeas in Warm Regions
- Florida/Similar Subtropical Regions: Sow seeds from late March to early May (when soil temperatures consistently exceed 60°F/16°C).
- Hawaii: Plant during the dry season, typically late winter through early spring (February to March), allowing plants to mature before heavy rainfall.
- In all climates, avoid planting where late frosts or unpredictable cold spells threaten emergence.
Correct timing supports even germination, vigorous growth, and higher yields.
Step 3: Chickpea Planting Techniques for Warm Climates
Expert chickpea planting techniques are pivotal for healthy establishment, minimizing disease and stimulating even growth.
3.1. Correct Depth and Spacing
- Plant seeds 1–2 inches (2.5–5 cm) deep—shallow enough for rapid sprouting, but deep enough to prevent desiccation in hot weather.
- Within each row: Space seeds 4–6 inches (10–15 cm) apart.
- Rows should be 18–24 inches (45–60 cm) apart for airflow and reduced disease spread.
Tip: Use a furrow and tamp down the soil lightly after planting for good seed-to-soil contact.
3.2. Shade and Heat Stress Management
- In hot climates, particularly where afternoon sun is intense, partial afternoon shade from taller crops (e.g., maize) helps reduce heat stress without stunting beans.
- Use shade netting in the hottest months for delicate seedlings.
3.3. Planting Methods for Maximizing Yields
- Direct sowing is preferred—avoid transplanting, as chickpea root systems (tap roots) dislike disturbance.
- Where nematodes are prevalent, try raised bed planting and solarize the soil prior to sowing.
Farmonaut API for Precision Planting
Leverage our satellite weather and field data API to decide the optimal planting dates and watering schedules based on precise local forecasts. Our developer documentation aids seamless integration with your agronomy software.
Step 4: Irrigation & Water Management
Irrigation is a high-impact component of chickpea cultivation in warm climates. Drought resistance is a hallmark of chickpeas, but strategic watering at key stages makes a substantial difference in yields and plant health.
“Proper irrigation can boost chickpea yields by up to 30% in regions with high temperatures and low rainfall.”
4.1. When and How to Irrigate Chickpeas
- Keep the soil consistently moist (not saturated) during germination and early growth stages—these are the most critical periods.
- Apply 1 inch (25mm) of water per week in spring; increase to 2 inches (50mm) as temperatures rise or during flowering/pod fill.
- After pod fill, reduce irrigation to allow for proper pod drying before harvest.
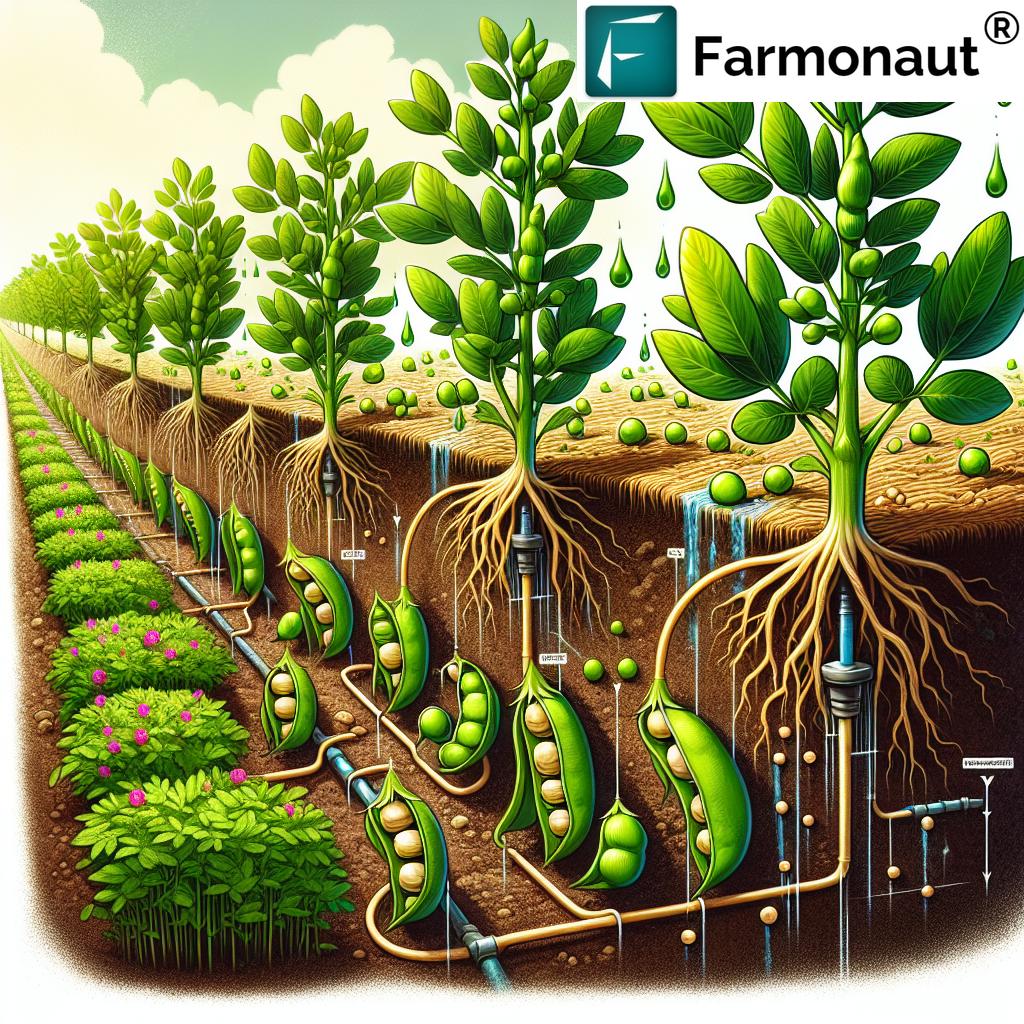
4.2. Drip Irrigation Method
- The best practice is drip irrigation, which applies water directly to the root zone, minimizing evaporation and reducing disease risk by keeping foliage dry.
- Install emitters to cover the full root spread, and use a timer for consistent, shallow watering.
4.3. Avoiding Common Water-Related Issues
- Avoid waterlogging—chickpeas are highly susceptible to root rot if the soil stays saturated, especially in clay soils or during prolonged rainfall.
- Monitor soil moisture routinely, especially during germination and flowering.
4.4. Smart Irrigation via Farmonaut
We help you monitor soil moisture and optimize irrigation schedules through our satellite-powered large-scale farm management dashboard. Our AI-driven platform notifies you of irrigation needs and drought stress in real time—reducing water costs and improving yields.
Step 5: Nutrient & Fertilizer Management
Chickpeas flourish in moderate fertility soils due to their superior ability to fix atmospheric nitrogen. However, optimal nutrient management maximizes flower set, pod fill, and seed weight—particularly in sandy, nutrient-poor soils common to warm climates.
5.1. Pre-Plant Fertilizer Strategy
- Incorporate a balanced, low-nitrogen fertilizer (e.g., 10-10-10 NPK) before planting, especially if a soil test indicates low phosphorus or potassium.
- Band applications (fertilizer placed 5–8 cm aside and below the seed row) max out phosphorus availability and promote robust root development.
- If using manure or compost, apply in moderation to avoid nitrogen-induced excessive vegetative growth at the cost of pods.
5.2. Fertility Maintenance During Growth
- Side-dress with compost or a low-nitrogen fertilizer when the plants reach 6 inches (15 cm) height to support pod formation.
- Monitor for micronutrient deficiencies (zinc, boron)—correct with foliar sprays if symptoms appear.
5.3. Key Nutrient Considerations in Warm Climates
- Warm, fast-draining soils are prone to leaching; mulching and judicious fertilizer timing help minimize losses.
- Do not use high-nitrogen fertilizers; excess nitrogen delays flowering and increases vegetative growth, decreasing yield.
Farmonaut’s Carbon Footprinting for Sustainability
For agribusinesses pursuing sustainability certifications or precise resource tracking, our Carbon Footprinting module quantifies input usage and emission reductions, aligning with global sustainable agriculture best practices.
Step 6: Chickpea Pest and Disease Management
A proactive approach to chickpea pest and disease management is essential, especially since warm climates foster rapid pest multiplication and disease outbreaks.
6.1. Common Chickpea Pests
- Aphids (<em>Aphis craccivora</em>): Usually cluster on young shoots and can transmit viral diseases; watch for sticky “honeydew” on leaves.
- Spider mites: Tiny, web-spinning pests—prevalent in hot, dry conditions, causing stippled leaves and reduced growth.
6.2. Major Chickpea Diseases
- Root rot (Fusarium, Rhizoctonia spp.): Often occurs with poor drainage or overwatering.
- Ascochyta blight: Favored by humid, warm weather; causes leaf, stem, and pod lesions.
6.3. Prevention & Organic Management
- Integrated pest management (IPM): Scout fields regularly for pest or disease signs, focusing especially during the early season and at pod set. Early infestations are easier to manage.
- Encourage beneficial insects like ladybugs for aphid control or apply organic insecticides such as neem oil if large populations persist.
- Crop rotation with non-legume crops (beans, maize, sorghum) breaks pest/disease cycles.
- Ensure soil drains well to prevent root diseases. Avoid excessive watering and remove infected plants immediately.
6.4. Utilizing Farmonaut for Early Pest and Disease Detection
Our satellite crop monitoring platform lets farmers spot areas of declining crop health using NDVI and other indices—vital for early pest/disease identification and targeted treatments, reducing chemical use and cost. See our detailed Product Traceability features for full field audit trails.
Step 7: Mulching for Chickpeas
Strategic mulching for chickpeas is among the simplest yet most powerful tools for conserving moisture, suppressing weeds, and moderating soil temperature during hot, dry periods.
7.1. Mulch Material Selection & Application
- Apply a 2–3-inch (5–8 cm) layer of organic mulch (straw, grass clippings, shredded leaves) around the base of the plants after seedlings are established.
- Maintain a mulch-free gap directly around stems to prevent rot.
- Replenish if mulch decomposes or is displaced by wind or irrigation.
7.2. Mulch Benefits
- Retains soil moisture—keeps the root zone cool, especially in warm climates.
- Suppresses weeds without herbicide use.
- Slows surface evaporation, aiding consistent watering intervals.
7.3. Advanced Weed Management
- Combine manual weeding with mulching to minimize labor and competition.
- Regularly remove weeds by hand or shallow cultivation, especially before canopy closure.
Chickpea Harvesting Methods
Timely and proper harvesting ensures high seed quality and avoids post-harvest losses due to mold or sprout. Here’s how to handle the final (and most rewarding!) step of your chickpea season.
When to Harvest
- Expect ripening in 90–100 days after sowing.
- When pods turn brown and dry out on the plant, and leaves yellow/drop, it’s time for harvest.
How to Harvest & Post-Harvest Care
- Cut plants at ground level—gently so as not to shatter dry pods.
- Bundle plants and hang upside-down in a well-ventilated, shaded spot for 1–2 weeks until fully dried.
- Shell pods by hand or crack with a rolling pin; remove any debris and damaged beans before storage.
- Store dried chickpeas in an airtight container in a cool, dry room for best shelf life.
Best Practices for Large Plots
- For acre-scale plots, use a combine harvester fitted with a low-speed drum and wide sieve to protect fragile seeds.
Blockchain Traceability for Quality Assurance
Our blockchain-based product traceability records harvest data and movement along the supply chain, delivering transparent, tamper-proof proof of crop origin and safety—even as far as the export market. Learn more at our traceability page.
Chickpea Cultivation Steps and Optimal Conditions Table
How Farmonaut Supports Sustainable Chickpea Farming
At Farmonaut, providing actionable, real-time data and tools for precision agriculture is at the heart of our mission—to empower farmers cultivating crops like chickpeas in warm climates.
- Satellite crop health monitoring: Pinpoints crop stress and soil moisture variation, helping optimize watering and fertilizer use.
- AI-based advisory (Jeevn AI): Recommends irrigation timing, pest management, and identifies potential disease outbreaks before they spread.
- Traceability tools: Trace every crop input, event, and movement—essential for organic certification and market confidence. Learn how our traceability solutions power supply chain transparency.
- Resource and fleet management: Keep irrigation, machinery, and harvest operations running efficiently with fleet management apps.
- Access anywhere—anytime: Our services run across Android, iOS, and browser platforms—for individual farmers up to large-scale agribusiness operations.
- API access: Developers can plug into our satellite, weather, and advisory data using the robust Farmonaut API.
- Crop loan & insurance support: Our crop loan and insurance modules make it easier for producers to access financial products, leveraging satellite data for verification.
Farmonaut Subscriptions: Affordable Precision Ag for All
Frequently Asked Questions (FAQ)
What is the optimal soil pH for chickpeas?
The optimal soil pH for chickpea cultivation is 5.3–7.0, with the ideal range being slightly acidic to near neutral (around 6.0). Test and adjust your soil pH before planting for the best growth results.
How can I prevent diseases like root rot in chickpeas?
To prevent diseases such as root rot, ensure your soil has excellent drainage, avoid overwatering, plant in raised beds where needed, and regularly rotate with non-leguminous crops. Healthy chickpea cultures thrive when excess moisture does not accumulate.
What is the best irrigation method for chickpeas in hot climates?
Drip irrigation is recommended for chickpeas in warm climates. It delivers water directly to the root zone, minimizes evaporation, reduces water loss, and helps prevent fungal diseases by keeping plant foliage dry.
When should I harvest chickpeas?
Harvest chickpeas when the plants and pods are fully dry, typically 90–100 days after planting. The leaves should yellow and drop, and the pods turn brown and rattle when shaken. Proper drying ensures safe storage and prevents mold.
What type of mulch is best for chickpeas?
Use organic mulch such as straw, dried grass clippings, or shredded leaves. Mulching conserves soil moisture, reduces temperature stress on roots, and effectively suppresses weeds throughout the growing season.
How does Farmonaut help farmers growing chickpeas?
We at Farmonaut provide real-time satellite crop health monitoring, soil moisture tracking, AI-based irrigation and fertilizer recommendations, and blockchain-based traceability. Our platform supports farmers in improving yields, reducing costs, and easily managing all stages of chickpea production from planting to harvest.
Conclusion: Achieving Success with Chickpeas in Warm Climates
Cultivating chickpeas in warm climates is highly rewarding when approached with careful planning, stepwise management, and an understanding of the crop’s needs at each stage. The keys to optimal yields are chickpea soil preparation, timely planting using the right techniques, smart irrigation, organic pest and disease control, and effective mulching and harvest methods. By following each of the actionable tips above—tailored for regions like Florida and Hawaii—farmers and gardeners can maximize their success with these nutrient-rich legumes.
Embracing technological support, like the advanced tools from Farmonaut, further empowers farmers to optimize chickpea production with precision farming solutions that ensure sustainability, traceability, and improved profitability for all scales of operation.
Begin your journey and make data-driven farming effortless—visit our Farmonaut web platform or download the mobile app today!


